Ginger Cookies

Ginger Cookies

A Recipe from The Christmas Cookie Book (1949)

About the Recipe

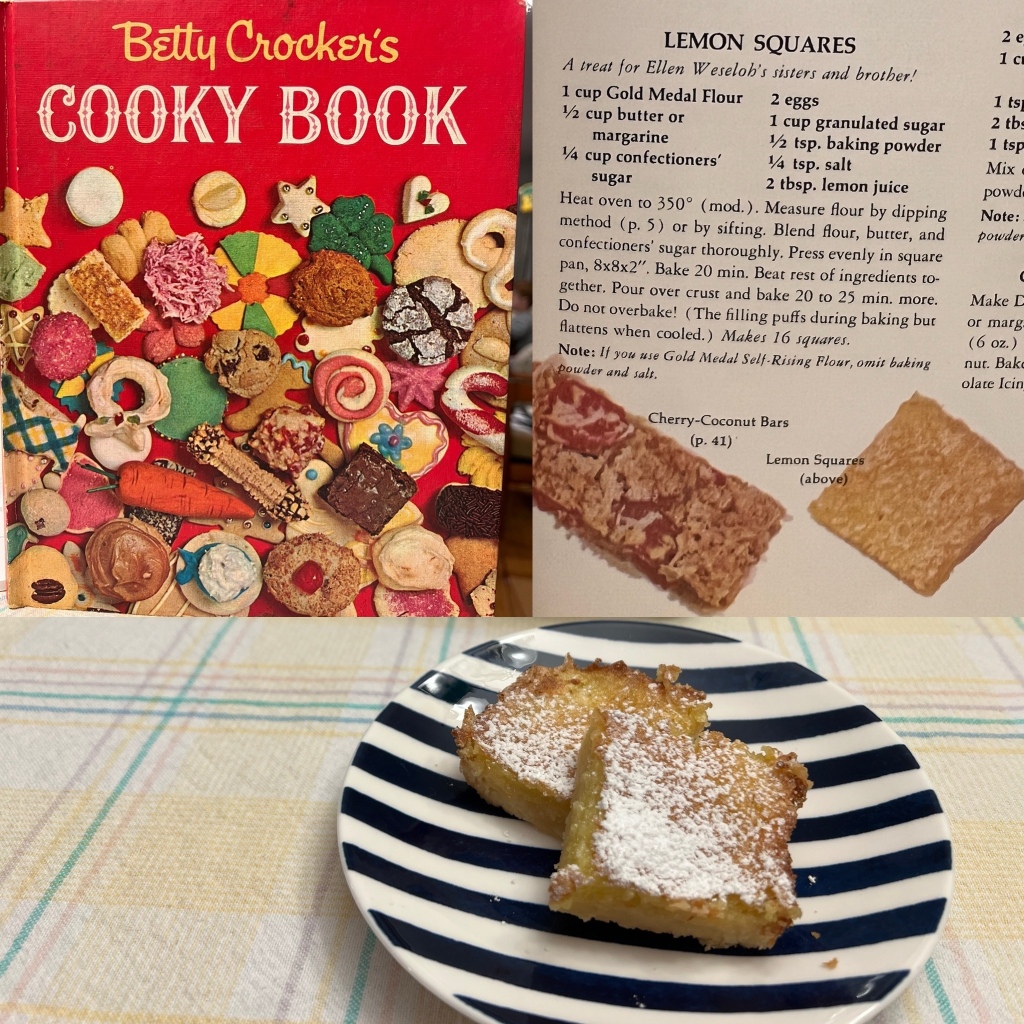
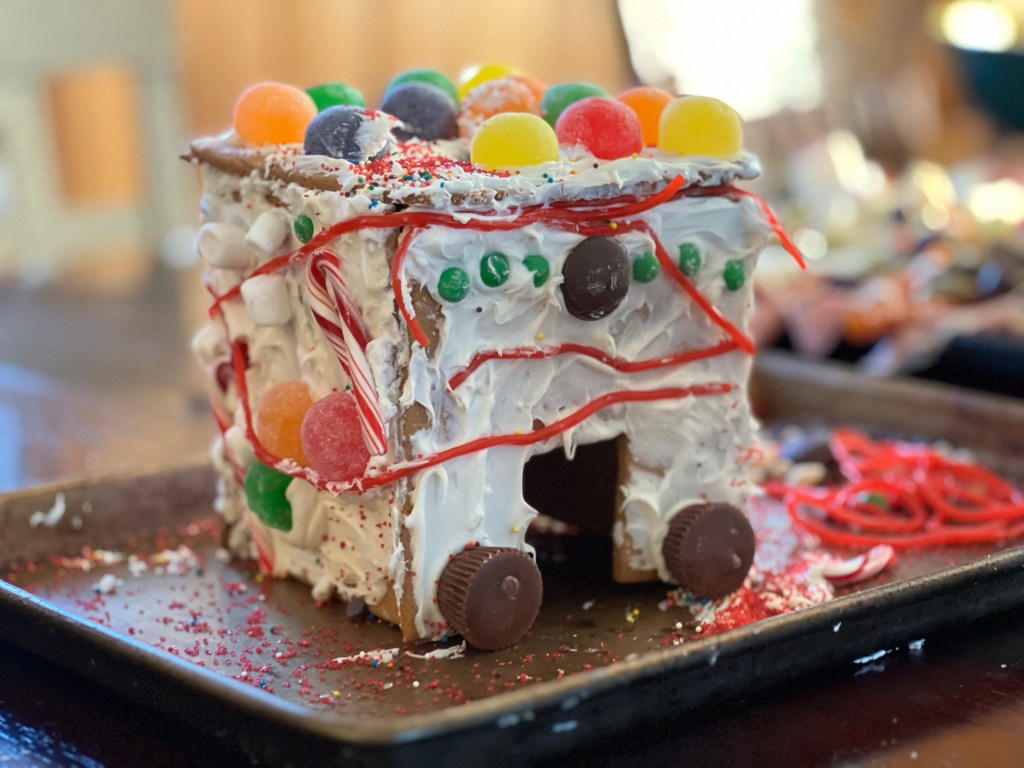
For this year’s Christmas gathering, I was craving a special treat to work on with my son and one of my favorite chosen niblings. With fingers crossed, I pulled out this recipe, made a few small tweaks (a little less molasses makes for a crunchier, sturdier cookie wall), and worked with my family to start architecting a design.

I have to say, these cookies were absolutely superb. They held up to decorating, and with a 2-year-old and a 5.5-year-old going to town, hyped up on sugar, that’s no small feat. They had a nice crunch, but didn’t break teeth. They have just a hint of sweet, and plenty of spice coming up behind. All in all – an absolutely perfect, Christmas-y cookie.

For those who also would like to build, I used Alton Brown’s Royal Icing recipe, which not only worked splendidly, but lasted for a few days stored in an airtight container.
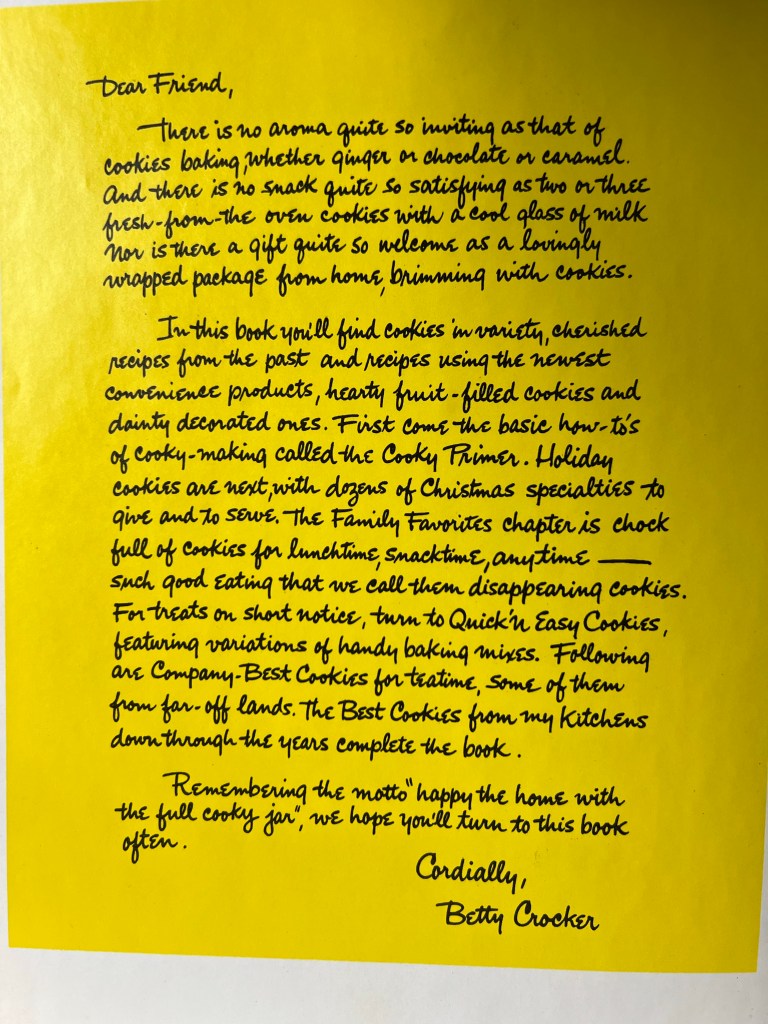
About the book

The Christmas Cookie book was a gift from a dear friend of mine. Back when I was first starting my collection, she knew that my house was a hub for Christmas, and that I was very into these old cookbooks. I had absolutely no idea there were quite so many varieties of Christmas cookies, and I think I’ll work on trying a new one from this book each year, especially if they’re as successful as this ginger cookie recipe was.

One thing to note here – it’s very common for books of this time period to have kind of half recipes. You’ll notice in the recipe below, that this book has a delightful variation on that – it gives you not quite enough information in some places, and way too much in others. I absolutely love it.

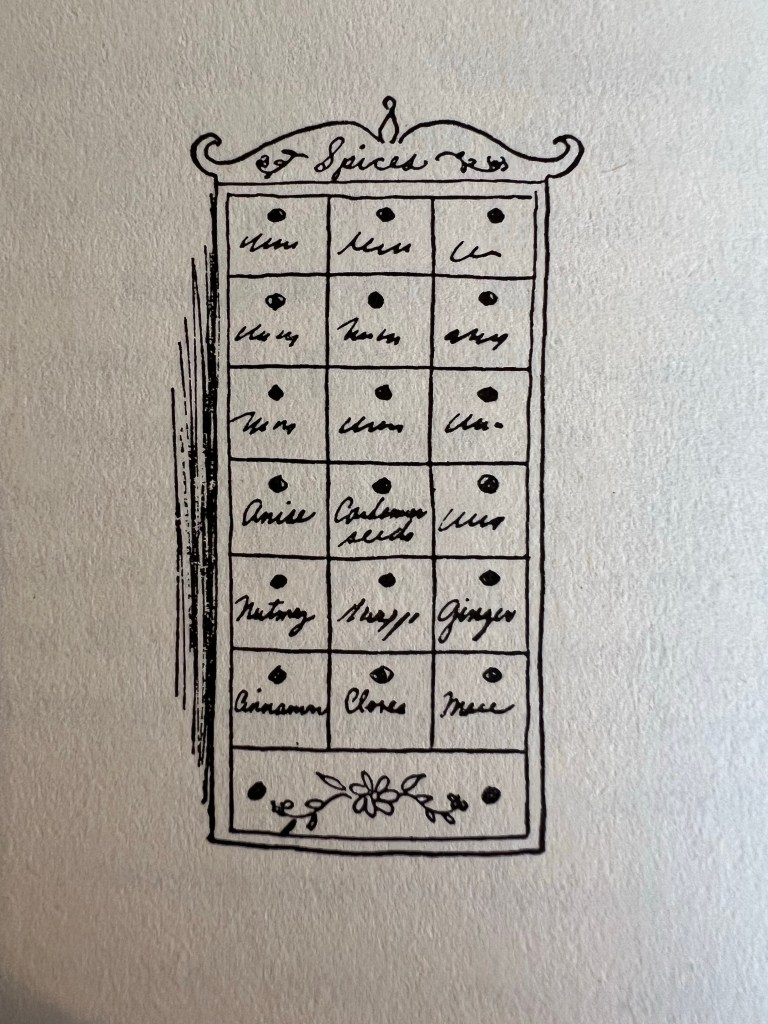
In addition to the heaps of lovely, over/underwritten recipes, there’s a wonderful collection of little illustrations throughout the book:

Building the Houses

I try not to make these blog posts too long, but I can’t resist a special section for this one:

The Recipe!

Ingredients:

5/8 cup molasses
1 3/4 cups sugar
1/2 cup butter
1/2 cup thick sour cream
2 T finely chopped orange peel
2 t cinnamon
1 t each cloves, all-spice, ginger
4 egg yolks
2 t baking soda
6 cups flour (about)

Directions:

Heat molasses and sugar until dissolved. Add butter and allow to cool before adding cream, chopped orange peel and seasonings. Add one yolk at a time alternately with the flour sifted with soda. Cut out in Christmas tree, stocking or bell shapes. Brush with egg yolk and sprinkle with colored sugar. Or cut out in Santa Claus shapes to be frosted after baking. Bake in a moderate oven (350*) for about 15 minutes. This cookie has a wonderful flavor, but has a bad habit of rising, then falling, in the oven, and so ends up with a wrinkled surface. It therefore looks much better when decorated.

Lemon Squares

Lemon Squares

A Recipe from Betty Crocker’s Cooky Book (1963)

About the Recipe

I’ve been on a baking kick lately and I was looking for something new, but maybe outside of the normal flavors of the season. There is a point where there is too much ginger, nutmeg, and cinnamon, and it’s possible I’ve hit my limit a little early this year. So when I went looking for a dessert, I wanted something that would lift up an otherwise heavy meal. Clearly lemon squares are the answer.

Sometimes lemon squares or lemon bars can be complicated. These are some of the easiest and most effective and delicious that I’ve made. The bottom is buttery and crumbly and just melts in your mouth. The whole thing took about an hour from start to finish and makes 16 squares. It was perfect for a quick and yummy dessert to make on the fly.

This recipe is a little on the sparse side. Betty seems to bank on the baker knowing certain technical skills and best practices when it comes to cookies and bars. I’ll offer a few tips to make this recipe really a success:

  • Use refrigerator cold butter to cut into your flour and confectioner’s sugar. Cut it into smaller pieces, and then toss it in. It makes it much easier to blend.
  • I used a pastry blender to get the base mix down to a sand-like texture. It would be just as easy to pop it all into a food processor and pulse until you get the same texture. This helps to create that buttery, crumbly base that no one can resist.
  • My husband loves a lemony lemon bar, so I added a little bit more juice than recommended. Next time, I’ll also add some fresh zest or dried lemon peel to really make it zing.
  • Wait until it cools to cut it! If you don’t you risk the top kind of coming apart on you. I also recommend keeping a wipe nearby to clean your knife as you cut, just to make it a little bit more neat.
  • The recipe doesn’t call for the confectioner’s sugar on top, but who doesn’t love a little dusting on the top of a lemon bar?

About the book

The Betty Crocker Cooky Book is a staple of any mid-century cookbook collection. It seemed like everyone had a copy… except for me. But lo and behold, my favorite Antiques Barn in New Paltz, NY came through again! I found it hiding on a cart, just waiting for me to grab it up.

It’s worth the reminder here that Betty Crocker was not a real person, but a very complex (and effective) marketing scheme. I love the detail that they give to her character in these books. Worth a read to really get yourself in the mood for some vintage baking:

The Recipe!

Ingredients:

1 cup flour
1/2 cup butter or margarine
1/4 cup confectioners’ sugar
2 eggs
1 cup granulated sugar
1/2 t baking powder
1/4 t salt
2 T lemon juice

Directions:

Heat oven to 350*F. Measure flour by dipping method or by sifting. Blend flour, butter, and confectioners’ sugar thoroughly. Press evenly in square pan, 8x8x2″. Bake 20 min.

Beat rest of ingredients together. Pour over crust and bake 20 to 25 minutes more. Do not overbake! (The filling puffs during baking but flattens when cooled.)

Chafing-Dish Meat Balls

Chafing-Dish Meat Balls

A Recipe from Good Housekeeping’s Complete CHRISTMAS COOKBOOK (1967)

About the Recipe

Each year for Christmas, my husband and I host what we call Orphan Christmas. We invite friends who are Jews (like us), who are unable to really travel, or who just have no where else to go to join our holiday gathering and table. We cook a big meal and sit down together to make merry. It’s basically heaven.

This year, I dipped into a new-old cookbook to create these meatballs, and they did not disappoint! They remind me of the Swedish meatballs a friend used to make for various festivities (and maybe for Christmas once or twice). The meatballs themselves are fantastic. It’s a great, easy recipe. I can easily see making a batch of them and then freezing them for a day when I don’t feel like cooking but want good spaghetti and meatballs.

In lieu of canned tomato juice, I opted for some bloody mary mix which I had on hand. I paired that with some original Sweet Baby Ray’s barbecue sauce, a favorite in our household, to make the sauce. I’ll go ahead and say, use whatever you really enjoy. It’s hard to miss on this one as long as you have the sweet in the barbecue sauce and the savory in the tomato juice.

About the book

I got this book as part of a set from my secret holiday gifter on my team at LinkedIn! I mentioned that I collect and cook out of vintage cookbooks, and this delightful set arrived on my doorstep. The Good Housekeeping Complete Cookbooks come in a set of 15 books, along with a plastic holder. This book is one of the set. As with so many of these MCM cookbooks, it comes complete with terrible food photos and delightful illustrations. I’m so excited to cook some more out of these books.

About the glassware

This barbed wire pattern divided dish is one of my favorite finds. It was a limited release in 1958 and I found it complete with a lid and in perfect condition. The cradle it’s in didn’t come with it, but is a partner to another divided dish that I have. It was the first pattern released on a divided dish, originally called the Cinderella Divided Serving Dish – delightful!

The Recipe!

Ingredients:

1 1/2 lbs chuck, ground
1/2 cup finely-sifted dried bread crumbs
1 t salt
1/4 t pepper
1 egg, slightly beaten
1/2 cup milk
1/4 cup shortening
2 cups canned tomato juice
2 T regular all-purpose flour
3/4 cup bottled barbecue sauce
1/4 cup water
1 1-lb. 4 1/2-oz. can pineapple chunks, drained

Directions:

Early on day:
1. In bowl, with 2-tined fork, toss together chuck, bread crumbs, salt, pepper, egg, and milk until well blended. Shape into 1/2- to 3/4-inch balls. Place in shallow pan with shortening; refrigerate.
2. In saucepan combine tomato juice and flour until sooth. Add barbecue sauce and water; blend well.

About 1 hour and 30 minutes before serving:
1. Start heating oven to 350*F.
2. Bake meat balls 30 minutes; now drain off excess fat then pour on tomato sauce; bake 45 minutes longer.
3. To serve, spoon meat balls and sauce into chafing dish or serving dish, with pineapple chunks here and there.

Makes 48 meatballs.

Macaroni with Paprika-Mushroom Sauce

Macaroni with Paprika-Mushroom Sauce

A Recipe from Recipes by Rakusen’s (195?)

About the Recipe

When a friend brought this (along with 2 other also amazingly vintage Rakusen’s books) back from England for me, I couldn’t wait to give it a go. These recipes are classics, and this one didn’t disappoint.

This comes together almost like an easy macaroni and cheese without the cheese. The sauce is rich and delicious, and pairs delightfully with the mushrooms. That said, both the husband and I agreed that more vegetables and even small bites of meat (I would go chicken or steak) would go well with this, and there’s more than enough sauce to make it happen. All in all, an excellent start to cooking with these little booklets. And hey – this was fully Maxx approved, so you know it’s gotta be good!

About the book

I try to keep these entries short and sweet to let you get to the recipe quickly, but forgive me on this one while I wax poetic a little bit about this book. As I said, it came from a friend who brought them from England for me. Rakusen’s is like the Manischewitz of England. It was founded in Leeds in 1900 and is a top provider of Kosher ingredients throughout the country. It was just so fun to look through these booklets, clearly designed to enjoy Rakusen’s fine line of products throughout the year.

There’s no date on the booklet, but it looks to be about 1950’s/60’s, and online listings of them seem to be in line with that as well. The illustrations and funky fonts lean more toward late ’50’s/early ’60’s, but regardless are everything that just works for these old advertising booklets. As per usual though, I remain grateful that food photography has come a long way since that time period.

The Recipe!

Ingredients:

1/2 cup butter
1 large onion
1/2 lb. mushrooms
1 cup sour cream
1 1/2 t paprika
1/2 t salt
1/8 t pepper
8 oz. macaroni

Directions:

Melt butter in frying pan. Chop onion and sauté in butter until light brown. Remove onion. Slice mushrooms and sauté in same fat until tender. Add remaining ingredients (including onion), except macaroni. Mix well and heat. Cook macaroni in boiling, salted water until tender. Drain. Place in serving dish and pour sauce over. Serve at once. Serves 6.

Brownie Pudding

Brownie Pudding

A Recipe from Better Homes & Gardens Dessert Cook Book (1960)

About the Recipe

My friend Antonella had a birthday last week. As such, she had a (Covid responsible) birthday party yesterday. I asked two questions: Hot or cold? Fruit or chocolate? Her answer: Hot, and chocolate! So, I dove into my favorite dessert cookbook and BEHOLD! Brownie Pudding.

Now I know, it kind of looks like poop on a plate. That happens with chocolate dishes sometimes. But with that out of the way, holy crow is this a delicious dessert. It’s kind of like a sponge cake on top and that wonderful, gooey Jello chocolate pudding (not the instant, the one you actually have to cook) from childhood. Just check out Antonella’s very enthusiastic first taste:

And all in all, this wasn’t that hard to make. There are a lot of parts and pieces to the ingredients, so read the recipe carefully. But from there, go forth and enjoy, because this one’s a winner.

About the book

The Better Homes & Gardens series of cookbooks was, and continues to be, one of the best. The recipes are designed for the home cook, and I’m not sure that I’ve had one so far that hasn’t turned out fantastically. This dessert cook book is a particular favorite. On top of the winning recipes, the illustrations and tone of the book always make me smile.

The Recipe!

Ingredients:

1 cup sifted enriched flour
3/4 cup granulated sugar
2 T cocoa
2 t baking powder
1/2 t salt
1/2 cup milk
2 T salad oil
1 t vanilla
3/4 to 1 cup chopped walnuts
3/4 cup brown sugar
1/4 cup cocoa
1 3/4 cups hot water

Directions:

Sift together first five ingredients. Add milk, salad oil, vanilla; mix smooth. Add nuts. Pour into greased 8x8x2-inch pan. Mix brown sugar, and 1/4 cup coca; sprinkle over batter. Pour hot water over entire batter. Bake at 350*F about 45 minutes.

Maple Candied Sweet Potatoes

Maple Candied Sweet Potatoes

A Recipe from Cast Iron Cookbook (1969)

About the Recipe

There’s nothing like the combination of sweet potatoes and maple syrup. When my husband issued the challenge to cook us more of this delectable root vegetable, I happily took it on. I landed on this recipe to try to break in our new cast iron skillet, a most welcome addition to the Cooking Vintage kitchen.

This is actually a really simple recipe that I think celebrates the sweet potatoes themselves. I would even be so bold in the future as to turn this into an easy tzimmes recipe, substituting some of the potatoes with carrots and squash, and adding some dried prunes and raisins into the mix. But all that said, this recipe is perfect as is and will definitely find its way to my plate again.

We combo’d the potatoes with a green salad and some slow cooked salmon (pop it in with the potatoes at the 35 minute mark!) for a delicious dinner.

About the book

The Cast Iron Cookbook is part of the Nitty Gritty line of cookbooks. I know collectors who just collect these books, and now I understand why. It’s a delightful little book full of great illustrations, and even better recipes. They’ve broken down the recipes into different types of cast iron cookware, and of course there’s an index in the back. I think I may have another series to track down…

The Recipe!

Ingredients:

6 large sweet potatoes, unpeeled
2/3 cup maple syrup
1 t salt
2 T butter, melted
1 cup apple cider
1/3 cup water

Directions:

Heat oven to 300*F. Wash potatoes and boil until nearly tender. Drain and cool enough to handle. Peel and slice about 1″ thick, and place in greased skillet. Add salt and butter to maple syrup, then add cider and water. Bring to a boil and pour over the potatoes. Bake about 1 hour. Baste from time to time with syrup.

Frankfurter Crown Casserole

Frankfurter Crown Casserole

A Recipe from Easy Ways to Delicious Meals, a Campbell’s Cookbook (1968)

About the Recipe

It’s been awhile since I’ve had an opportunity to crack open a cookbook, so I thought I’d come back with a mid-century bang! I love a recipe that strikes me as so crazy it just might work, and thankfully this one does.

It’s deceptively simple to make, and as a new mom who was worried about too much time spent in the kitchen, I was thrilled when it came together much more quickly than expected (about an hour from start to finish, and only because I had to cook the potatoes). I used frozen green beans, which worked just fine. In the future, I’ll probably use the veggie medley instead to give it a little more depth of flavor, or even just throw some fresh veggies in there. This dish would be well served with some broccoli florets or diced mushrooms thrown into the mix. Just sauté them with the onions a little bit to soften them up.

One more thing – cut the salt in half at least. The soup adds plenty of salt on its own, and combined with the frankfurters, it’s a lot.

About the book

I love these mid-century Campbell’s soup cookbooks. I’ve made a few recipes out of them before, and they never disappoint. My favorite part is this combo of full color photos and cute little illustrations. For this dish in particular, I was amused that they snuck in the full color photo of the Frankfurter Crown in the first section of the cookbook. And then (just in case that didn’t sell you), there was an illustration as well. It was truly a no-brainer to pick this particular recipe out of the lot.

The Recipe!

Ingredients:

2 slices bacon
1/2 cup chopped onion
1 can (10 1/2 oz.) condensed cream of mushroom soup
1/2 cup water
1/2 t salt
Dash pepper
3 cups sliced cooked potatoes
1 cup cooked cut green beans
1/2 lb. frankfurters, split and cut in half

Directions:

Cook bacon. Remove and crumble. Cook onion in drippings until tender. Stir in soup, water, salt, and pepper; add potatoes and green beans. Pour into 1 1/2-quart casserole. Stand up frankfurters around edge of casserole. Bake at 350*F for 30 minutes. Garnish with bacon.

Chicken Breasts Baked in Cream

Chicken Breasts Baked in Cream

A Recipe from Betty Crocker’s New Dinner for Two Cook Book (1964)

About the Recipe

Chicken is a staple in our household, but even our favorites can start to get old. I had some chicken breasts in the freezer so I went on a search through my books! Betty Crocker (almost) never fails, and this recipe looked simple enough for a Friday evening. Fair warning though – it takes 2 hours to bake! The cook time on this in total is about 2.5 hours all told.

I made a few adjustments on this one – I substituted olive oil for the shortening and used fat free half and half instead of proper cream. Removing all of the fat from this dish meant getting rid of some of the richness. We ended up with a (more cholesterol friendly) baked chicken, rich in flavor but not in fat. Oh – and as with most recipes, the amount of onion and garlic is just a suggestion. Go to town, with Betty’s blessing I’m sure.

About the Book

I found this book in a giant antiques mall in Virginia on a recent road trip with the husband. There was a whole section just of antique and vintage books and I was in heaven! If you’re in the area (or even just slightly out of the way), the Factory Antique Mall in Verona, VA is well worth the trip.

All of the Betty Crocker books in this time period and format are worth the purchase. The mid-century illustrations are so fantastic, and the recipes, for the most part are excellent. This one is dedicated to small families or “the career girl enjoying her first apartment.” In particular, this recipe comes from the section dedicated to when company comes. The recipes and menus feel like they’re adapted for when you were planning for two… and then surprise! company comes. All in all, this book is wonderful. Snag it if you find it.

The Recipe!

Ingredients:

2 whole chicken breasts (about 2 lb.)
3 T shortening
1/3 cup chopped onion
1 small clove garlic, minced
3/4 cup chicken broth
3/4 cup cream (20% butterfat)
1 1/2 t salt
1/8 t pepper
2 t Worcestershire sauce

Pan Gravy:
2 T fat
2 T flour
1 cup liquid (water, meat stock, or bouillon cube broth)

Directions:

Heat oven to 300*F (slow). Cut chicken breasts in half crosswise, making four serving pieces. In a heavy skillet, brown breasts in shortening until golden. Add remaining ingredients. Cover tightly. Bake about 2 hr. or until tender. Just before serving, remove chicken from skillet; keep warm while making Pan Gravy

Pan Gravy:
Remove meat to warm place. Pour off clear fat (not drippings); measure amount needed into small saucepan. Measure liquid into roasting pan; stir and scrape all of brown drippings loose from pan — heat mixture if necessary; set aside.

Add flour to fat in saucepan; stir together until smooth. Cook over low heat, stirring steadily until it is bubbling.

Take pan off heat. Gradually stir in liquid and drippings from roasting pan. return pan to heat; bring to boil, stirring constantly. Boil 1 min. Season and serve.

Orange Bowl Coffee Cake

Orange Bowl Coffee Cake

A Recipe from 100 New Bake-Off Recipes from Pillsbury’s 16th Grand National (1965)

About the Recipe

Sometimes a dish comes out of the oven, and you show your little brother how to properly flip a baked dish, and as he lifts the casserole dish off, you’re crossing your fingers that it comes out properly – and then it comes cleanly out of the dish with a slow waterfall of caramel-y goodness and all you can think is – WOW. Yeah. This is that recipe.

“Coffee cake” is a little bit of a misnomer here, as this is far from the crumbly baked good you’re probably thinking of. This is more like a cinnamon bun loaf with hints of orange caramel; more suitable for pulling apart than for slicing.

I’ll admit, this came out looking a little bit different than in the photo that lives in the book (no, I’m not going to put it here). Be sure to let the orange juice and eggs come to room temperature so as not to make the yeast angry and you’ll be good to go. Even through my yeast flub, this dish gets the little brother seal of approval:

For more recipes in the Pillsbury Challenge, click here!

About the book

Pillsbury really goes the extra mile on the advertising front in this booklet. Not only are they pushing the new “Pillsbury Family Cookbook” (YOURS FREE for a Ten-Day Try Out!), but they dedicate the first few pages to new Instant Blending flour – “This gay new way to put a cake together!” Divine!

The Recipe!

Ingredients:

2 packets active dry yeast or 2 cakes compressed yeast
1/4 cup warm water
1/4 cup sugar
3/4 cup butter
1 1/2 t salt
1/2 cup milk, scalded
2 eggs
1/4 cup orange juice
3 1/2 – 4 cups flour
1 cup granulated or brown sugar
2 T grated orange rind
1 cup chopped walnuts

Directions:

Soften yeast in warm water. Combine in mixing bowl 1/4 cup sugar, 1/4 cup soft butter, salt and milk. Cool to lukewarm. Stir in eggs, orange juice and yeast. Gradually add flour to form a stiff dough. Knead on floured surface until smooth and satiny, 3-5 minutes. Place in greased bowl, turning dough to grease all sides. Cover; let rise in warm place until light and doubled, about 1 hour.

Cream 1/2 cup butter. Add 1 cup sugar and orange rind. Roll out half of dough on floured surface to a 12×8-inch rectangle. Spread with half of filling; sprinkle with 1/2 cup walnuts. Starting with 120inch side, roll jelly-roll fashion. Cut into twelve 1-inch slices. Arrange 1 inch apart on bottom and sides of well-greased 2-quart casserole or mixing bowl. Place remaining slices in center. Repeat with remaining slices in center. Repeat with remaining dough. Cover; let rise in a warm place until light and doubled, about 45 minutes. Bake at 350*F for 30-35 minutes until golden brown. Invert immediately onto cooling rack.

Variation: For orange-cinnamon coffee cake, add 1 teaspoon cinnamon to filling. If desired, drizzle warm bread with a vanilla glaze.

.

Pi(e) Day 2021

Pi(e) Day 2021

This image has an empty alt attribute; its file name is 35a2d46d-0c15-4052-baa2-28fada497d3f.jpg

I have always maintained that pies test my patience, and this year, just after the 1-year anniversary of the COVID-19 pandemic, they definitely did. The crusts took 3 tries to get out of the oven in a usable state. I needed to call in my sous-chef (husband) multiple times because I wasn’t ready for some of the multi-tasking that needed to happen. And yet – it was a successful pie day. Here’s what we made:

2021 Pi(e) Day WINNER! Orange-Pumpkin Chiffon Pie (1961)
Chicken Pie with Sweet Potato Crust (1940)
Cottage Cheese Pie (1963)