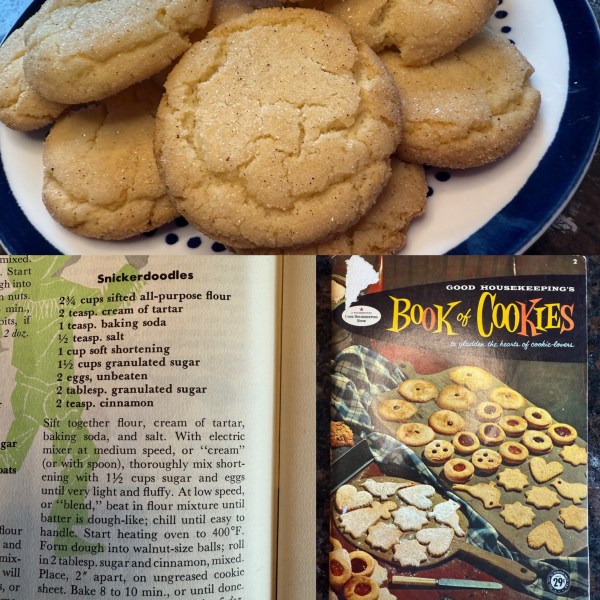
A Recipe from The Art of Making Good Cookies Plain and Fancy (1963)

About the Recipe
Are you drowning in apples from a beautiful day apple picking? Are you looking for the perfect autumn cookie to bring to your next bake sale? Do you have little patience for complex cookie recipes? Have I got a cookie for you.
This was a super simple, and wonderfully delicious recipe. And turns out – it’s totally vegan and allergen free!
A few quick notes to ensure that these come out great:
- I decided to make a quick applesauce when I had an abundance of apples and none in my pantry. If you decide to do the same (highly recommended), use a flavorful apple (honeycrisp, pink lady, a mix of red delicious and granny smith if you must go basic), a pinch of salt, and about a tablespoon of sugar. There’s a ton of flavor that will come from the rest of the cookie, and you can always add additional spice to your sauce later.
- I used a tablespoon sized cookie scoop and got almost exactly 5 dozen cookies.
- I went with mixed raisins for this one, but I can definitely see how some candied orange peel or even currants or craisins would have done well in this recipe.
- As always, substituting softened butter for your shortening will do fine in this recipe. Use a 1:1 ratio.
- Substituting a pie spice mix for the same amount of nutmeg and cinnamon (2 teaspoons total) will add some richness and variation.
As this book notes, this is a fairly plain, but utterly delicious cookie. Well worth the bake this time of year.
About the book
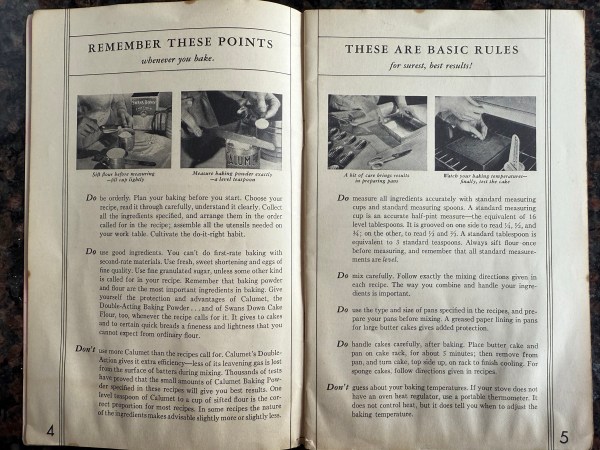
This is a brand new book to my library, and gosh I just can’t wait to dig into it again. It’s literally a mid-century cookie primer. It has some truly interesting and different recipes. And I love all of the little diagrams, tips, and tricks designed to help an amateur baker make a successful cookie. I’ll share more when this book comes back around.
The Recipe!
Ingredients:
1 cup shortening
2 cups brown sugar, firmly packed
1/2 cup cold coffee
1 cup applesauce
3 1/2 cups all-purpose flour
1/2 t baking soda
1 t baking soda
1 t salt
1 t nutmeg
1 t cinnamon
1 cup light seedless raisins or candied diced fruit
1 cup currants or dark seedless raisins
Directions:
Cream shortening and sugar well. Add coffee and applesauce. Sift together dry ingredients and blend in, adding fruits last. Bake on lightly greased baking sheet at 375*F about 10 minutes (I baked mine for about 13) To keep soft, store in airtight container. 5 dozen