A Recipe from Hamilton Beach Food Mixer Instructions and Tested Recipes (1948)

About the Recipe
On a bright Mother’s Day morning, I was in a rush to get something in the oven. We were already starting to run late to a picnic and I wanted something easy to make and bring. This little Hamilton Beach booklet was sitting so invitingly on my counter, and something about a molasses cookie felt like exactly the right choice.
This recipe is designed to be made fully in your mixer – one bowl, one paddle, done! While usually I like to be a little more process oriented and precise, I decided to trust the process. The combination of buttermilk and baking soda created a fluffy, cake-like cookie. I substituted real maple syrup for the molasses without a problem. If you’re a ginger cookie fan, this easy recipe should suit you fine.
About the book
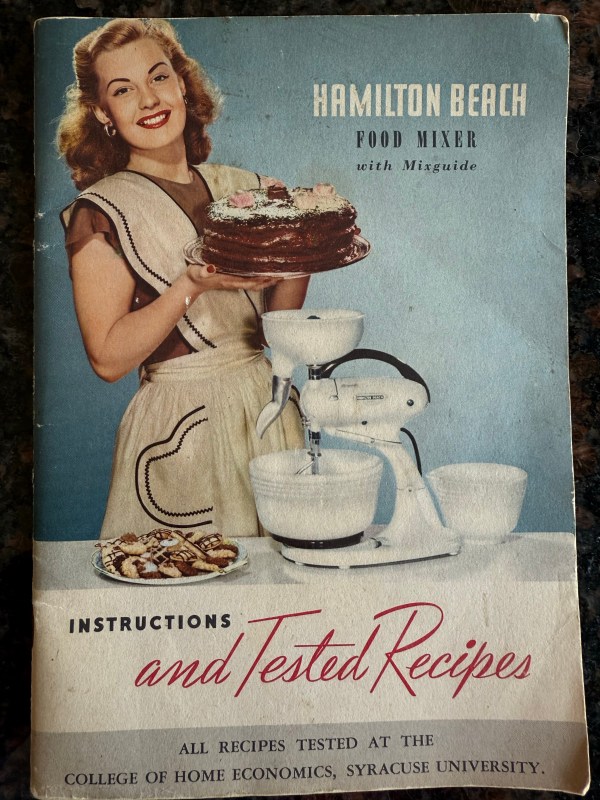
The Hamilton Beach booklet came from a close friend who saw it and grabbed it for me. It originally came with the Hamilton Beach Food Mixer and was created in collaboration with the College of Home Economics at Syracuse University. The goal, of course, being – use your mixer! I’ll let the rest of the booklet speak for itself…


The Recipe!
Ingredients:
2 cups sifted flour
1 t soda
1/2 t salt
1 1/2 t ginger
1/2 t cinnamon
1/2 t cloves
1/2 cup brown sugar, packed firmly
1 egg, unbeaten
1/3 cup molasses
1/3 cup buttermilk
1/2 cup shortening, soft
Directions:
*A quick note from your author: I’ve simplified this recipe for a modern mixer. Please see the image above (or message me) if you’d like the original
Preliminary: Preheat oven to baking temperature (350 degrees F). Have all ingredients at room temperature.
Sift into your mixer bowl flour, [baking] soda, salt, ginger, cinnamon, and cloves. Add in the rest of the ingredients (brown sugar, egg, molasses, buttermilk, and shortening). Beat at speed 3 for 3 minutes. Thoroughly mix all ingredients. Stop beater.
Baking: Drop by teaspoonfuls on an ungreased cookie sheet. Bake at 350 degrees F for 15-18 minutes.